Installing the “Link to us” widget
Login to your Blogger account.
Go to Design > Page Elements.
Click an Add A Gadget link.
In Add A Gadget window, select HTML/Javascript .
Enter the title of your widget. This is optional.
Copy the code below and paste it inside content box.
| <center> |
| <img src="ButtonUrl" value="BlogName"/> |
| <form action="http://beta.blogger.com/add-widget" method="POST"> |
| <input value="" name="Bsinker Link to Us" type="hidden"/> |
| <textarea style="display:none;" name="widget.content"> |
| <center><a href="BlogUrl"><img src="ButtonUrl" title="BlogName"></a></center> |
| |
| <input value="http://bloggersinker.blogspot.com" name="infoUrl"type="hidden"/> |
| <input value="Get the button" name="go" type="submit"/> |
| |
| <span style="font-size: 80%;">Get this <ahref="http://bloggersinker.blogspot.com/2009/05/how-to-install-link-to-us-link-exchange.html">widget |
| |
Where the code to be replaced is
ButtonUrlis the link to your link exchange button, badge or banner.BlogUrlis the URL of your blog.BlogNameis the name of your blog
Click Save.
By now you should be able to see your button/badge/banner with a “Grab this button” button right below it, similar to the picture above.
Testing the widget
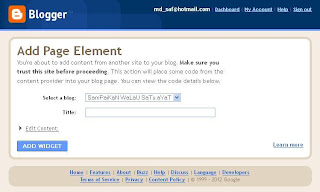
You want to test whether your link button installs correctly. Your readers will go through this same process when they want to grab your button.Go ahead click the “Grab this button” button. Add Page Element page will pop up:

Sesiapa yg nak share, sila sebarkan, tidak perlu minta izin.Ilmu ini datangnya dari Allah, untuk setiap manusia...

Copy this code to your website